Labels

Iron Hands Space Marines 40k painting dark angels Grey Knights Tau Scratchbuild NOVA Open Infinity Dreadnoughts WIP terrain librarian 30k Deathwing airbrush dark eldar Infinity the game warhammer Malifaux Xenos greenstuff hobby plasticard space marine terminator zenithal Adepticon Ariadna Autocannon Haqqislam Imperial Guard Interrogator-Chaplain Lion's Blade Mathhammer Rifleman Stormbird Titan army building bases battle company battle report counts-as force weapons master of the forge tactics 3d printing 6th Edition Age of Sigmar Apocalypse Blood Angels Chaos Da Boyz GT Emperor's Children Grotesques Landspeeder OSL Orks Razorback Resin Casting Scouts Scratch build Shapeways arbites codex review eldar fantasy high elves inquisition molds review 40k BBQ Adeptus Custodes AoS Astra Militarum BBQ Battleground Bikes Black Knights Blood of Kittens Cadre Fireblade Capital Palette Clash Comp Comp Deathwing Knights Display Board Doubles Dreamforge Eisenkern Elysian Escalation F.A.T. Mat Fallen Hoffman Horus Heresy Land Raider Crusader Lysander MDF Mig weathering powder 40k Onslaught GT Pathfinders Praetor Predator Riptide Space Wolves Stormraven Stronghold Assault Techmarine Teddy Typhoon Veterans Vulkan Warriors of Chaos archon astartes bike blending chaos marines color scheme custodes dark angels codex dark angels list ferrus manus forgeworld genestealer cults gesso hurricane bolters infinity kazak ariadna lakes land raider landspeeders laser cut marines mega battle miracles. object source lighting photography ponds rhno salamanders superheavy techmarine. thunderhawk tigurius wet-blend
Showing posts with label Space Marines. Show all posts

Monday, February 6, 2017

Back from the Lazarus pit with some hobby work

First post of 2017, and only a few things going on. I've taken a break from the stormbird to do a couple easier small projects though I've been thinking about trying to get the landing gear completely built before I take a longer break from work in the big flier.

I built a few MK 3 Marines for 30k/40k including a plasma support squad.


I've also mostly wrapped up work on my first five custodes. I expect to have anywhere from five to fifteen more down the road. Still working on the blades of the weapons but I'm trying to mimic the effect the 'Eavy Metal has done, I may bud to mute the brightness a little but we'll see how they look once I add some crackling electricity.


Finally I've started making a few custom bases to match my existing DragonForce bases. These are for a couple Iron Hands Astartes and my 40k admech force. I'll have some pics of them soon.


Monday, November 21, 2016

Stormbird scratchbuild - progress update

I've made a little more progress on disembarkation ramp doors and the interior area that will be exposed once the doors are open.


I've also begun building the landing gear feet and hinged arms. Ultimately the landing gear will be servo controlled so I'm going to begin building the mechanical components that will raise and lower the gear. I want to have a single servo control the front and rear landing gear so I'm going to have to figure out a lever system to get a longer range of motion since the rear gear sits higher on the hull. I won't be adding electronics till most everything cosmetic is done but I've left enough room to run wires for servos and LEDs and I'll be managing the rods and gears to run everything now.


Once the landing gear is built completely I can work on the 4 ball turrets. They'll be the last big piece to build before I can do all the detailing and layering that will make this look like a finished model.

It's not technically Stormbird progress but also bought a cool Tamiya motorized hobby drill. It comes a a model kit that requires assembly but was a fun little side project as a break from plasticard fabricating. It'll probably be really useful when i start adding the fine details.


I hope to have another update in about a week once I have at least the front landing gear mechanics working..

Friday, November 18, 2016

Thunderhawk turns into Stormbird


I started a Thunderhawk scratch build a while back out of a desire to have a fun project and end up with a super heavy for the odd Apocalypse game. I never had a real love affair with the Forgeworld Thunderhawk kit but thought this would be a good opportunity to make some scale and detail improvements along the way. However with the relatively recent release of the Sokar Pattern Stormbird I've decided to pivot and make my flyer into a different pattern of Stormbird. Mine will share all the important details that Forgeworld's has but I'm going give it a shape that I personally will like a little more. So far I've built out the basic hull, some of the engine components, wings that attach via magnetic system, and I've started on the side disembarkation ramps. As with any project like this it's begun to spiral and I'm sure I'll need to take a few months off soon but for now I've been building at a pretty intense pace.

Here's a photo dump of the work I've done so far.


These are the starting points for the secondary intakes on the engines, I'll be building four engines with slightly varying details for two of them.


I've mocked up the new wing shape here.

These are the mounts for the two engines on top of the fuselage. I decided to encase them in a boxy shroud sort of like the Storm Raven.

Here's a mock up of the engine shroud along with other unfinished engine components.

I've cut out a section on either side of the hull for the large ramps.


Here are the open and closed states of the ramps. I'll be doing a small amount of interior detail here as well as magnetizing the doors so they'll stay shut without any mechanism to hold them.

These are the intakes made out of some baby food caps and too much free time.

Here's the secondary intake mocked up on the wing, there will be one on the bottom as well when things are finalized.

And finally here's the rough state of things at the moment. I'll be cranking away on this during my vacation next week so hopefully I'll make a little more progress soon.

Monday, March 21, 2016

Thunderhawk Gunship Scratchbuild - The Beginning

"A beginning is a very delicate time." - Frank Herbert


After shopping around on the Forge World website I realized I wanted some sort of super heavy to go with my many Imperial Armies. I wanted some big powerful centerpiece and I thought a titan would be awesome but it would have to be at least a Reaver or larger and it's just more than I can rationalize for my hobby budget. I then made the foolish decision to attempt a superheavy scratchbuild project. It was either going to be a titan or a Thunderhawk Gunship, and  after some deep thought and introspection, the latter seemed a lot more of a reasonable prospect for me to actually complete someday.

After digging around in some google searches I stumbled across the infamous Blackadder's Thunderhawk scratchbuild and it really spoke to me. Instead of trying to match Forge World's now somewhat archaic sculpt and dimensions he worked from some very detailed resized digital renderings. These images were much more inline with what I thought the proportions ought to be, and Blackadder is an awe inspiring miniature scale engineer. Having made my decision I dug in and got to work.


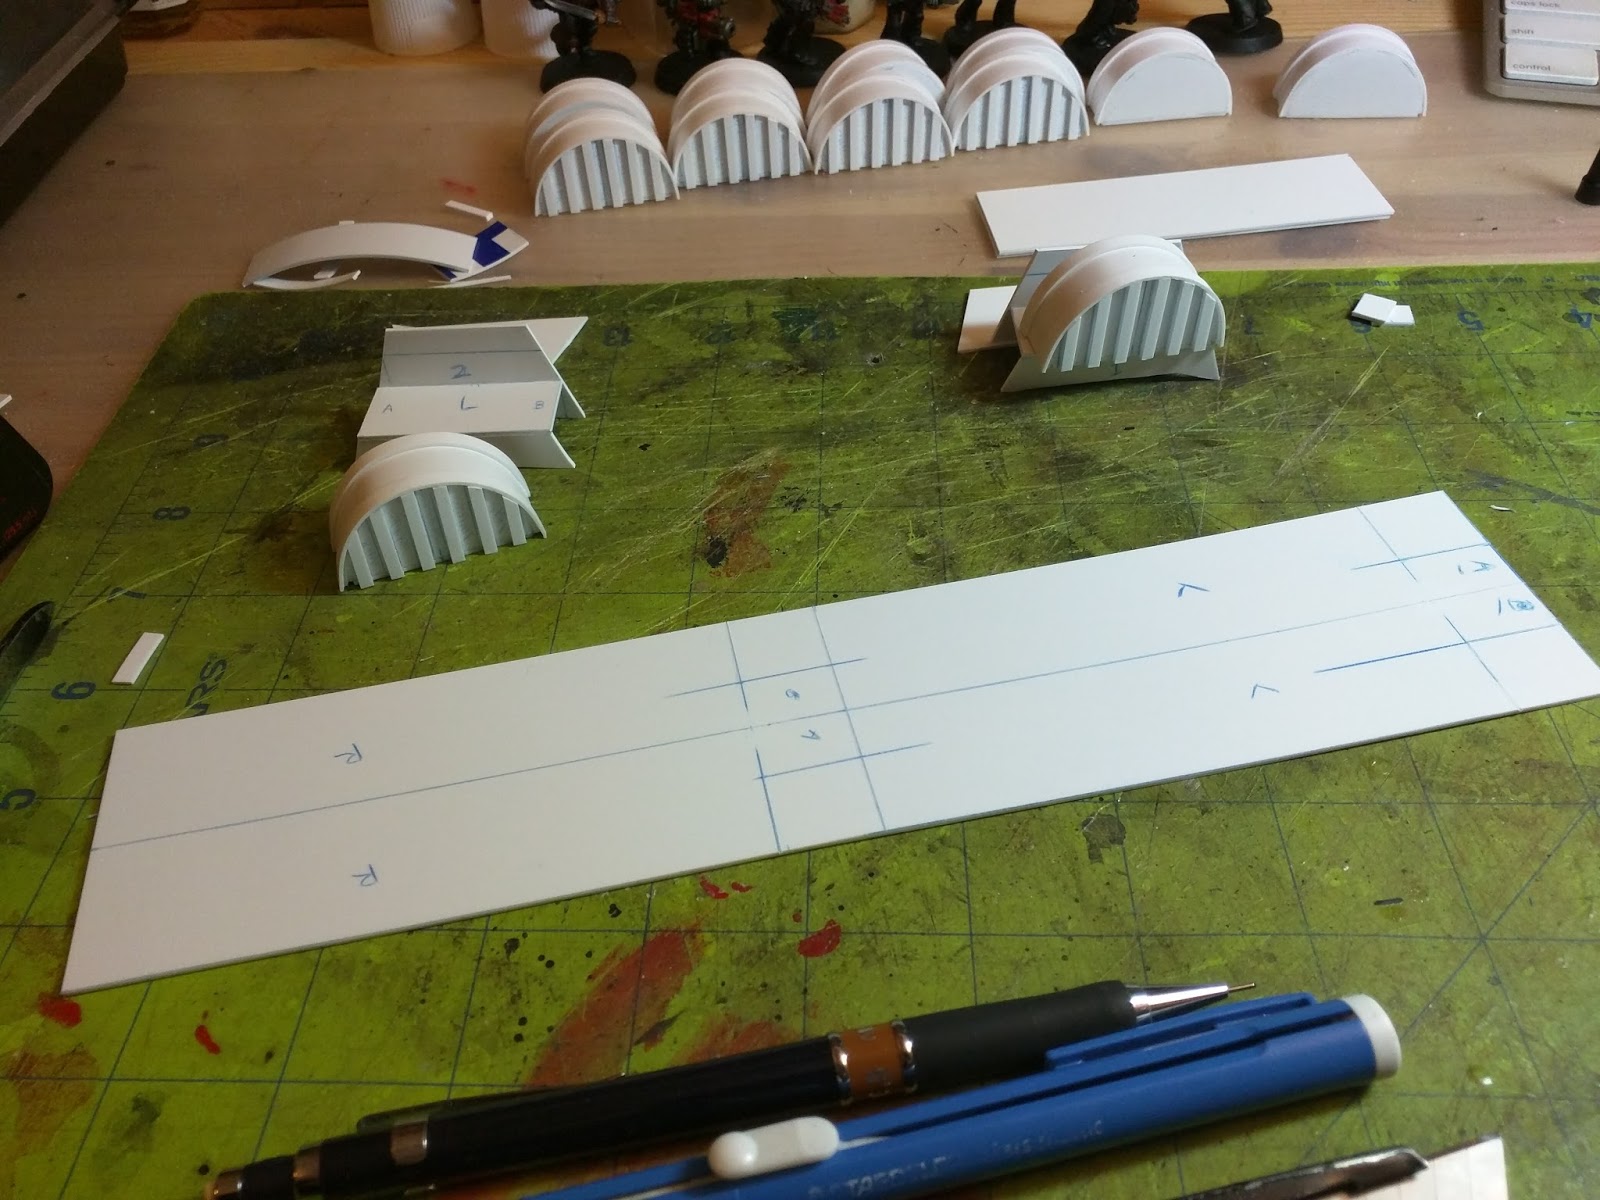
I scaled the images down to a size that seemed appropriate to me in terms of overall size. The 3D images I was working from had a much sleeker shape than FW's Thunderhawk with is just too short and stubby for me to be happy with. I think the official model clocks in at 19 inches in length, where mine will measure about 24 inches. The height of the fuselage will probably be a little shorter but it should look less like a shoe box with wings and more of a vaguely plausible flying machine. I had some old foam core floating around the workshop so I used that to build a rough hull matching the dimensions I wanted to go for. In retrospect this created a lot of extra work for me since the foam core I was using was slightly warped. There was a lot of bending and irritating glueing that had to happen to fix this but I've risen above to create a much more fleshed out hull.


My primary source for sheet styrene is from cheap $5 parking signs I purchased from Home Depot, they measure about 20 x 24 inches so you really get a lot for you're money. The only down side being the miscellaneous printing on one side of the sign. I've covered the foam hull with  this budget plasticard and have begun building out some of the structural portions of the hull like the nose, tail, and upper-hull turbolaser mount using only plasticard. It took a little while to collect all the materials I need for this which only cost me about $30 for enough various thickness plasticard to build almost everything but the engines and turbolaser, but now I'm making pretty rapid progress. I'm trying to get the basic hull shape built, then I'll be building the wings and various sub assemblies (engines, landing gear, cockpit, etc) separately and attaching them as I go. I think I'm also going to build the wings to be removable so I'll be able to move this beast around without snapping anything off.


In this last shot you can see how I'm building some of the structural parts of this model. Hopefully I'll have more to post soon.

Monday, June 29, 2015

Iron Hands Legion Praetor - work in progress

Ever since forgeworld released their Legion Praetor set a while back, I've had my eye on it. A few months ago I finally picked the kit up with the intention of making the power armored Praetor a foot Chapter Master, and the terminator armored Praetor a kitted out Librarian. Now, having nearly wrapped up work on my Devestator Centurions, I decided to pick these two models and try to get some work done on them.

As with the rest of my Iron Hands, I went with a muted dark grey/black base color and all silver metallic components. I wanted to make them look basic and utilitarian (by Astartes standards), like a machine that's well maintained as opposed to gilded with superfluous ornamentation. To make these guys stand out as HQs I decided to add some gold to their weapons, which isn't used anywhere else in the standard troops. I think it'll be a small detail that pops out on the tabletop.

First up the power armored Praetor. I'm not even close to being done with sword, its going to take a lot more precise blending but it's off to a good start.


 The terminator armored Praetor only really has paint on his face so far, which I left separate so I could access the details a little more easily.


While I'm not planning on playing 30k at the moment I just can't resist purchasing some of Forge World's amazing Horus Heresy models, and this kit did not disappoint. I'm hoping to keep cranking away on these guys and have them done in the next week or two.

Wednesday, June 17, 2015

Iron Hands Centurion Devastators

It's been a while since I had any progress towards my Iron Hands force, but I'm happy to say I've finally started picking up momentum again. Following the release of the new space marines codex, I decided to celebrate by completing my Centurion Devestators. 

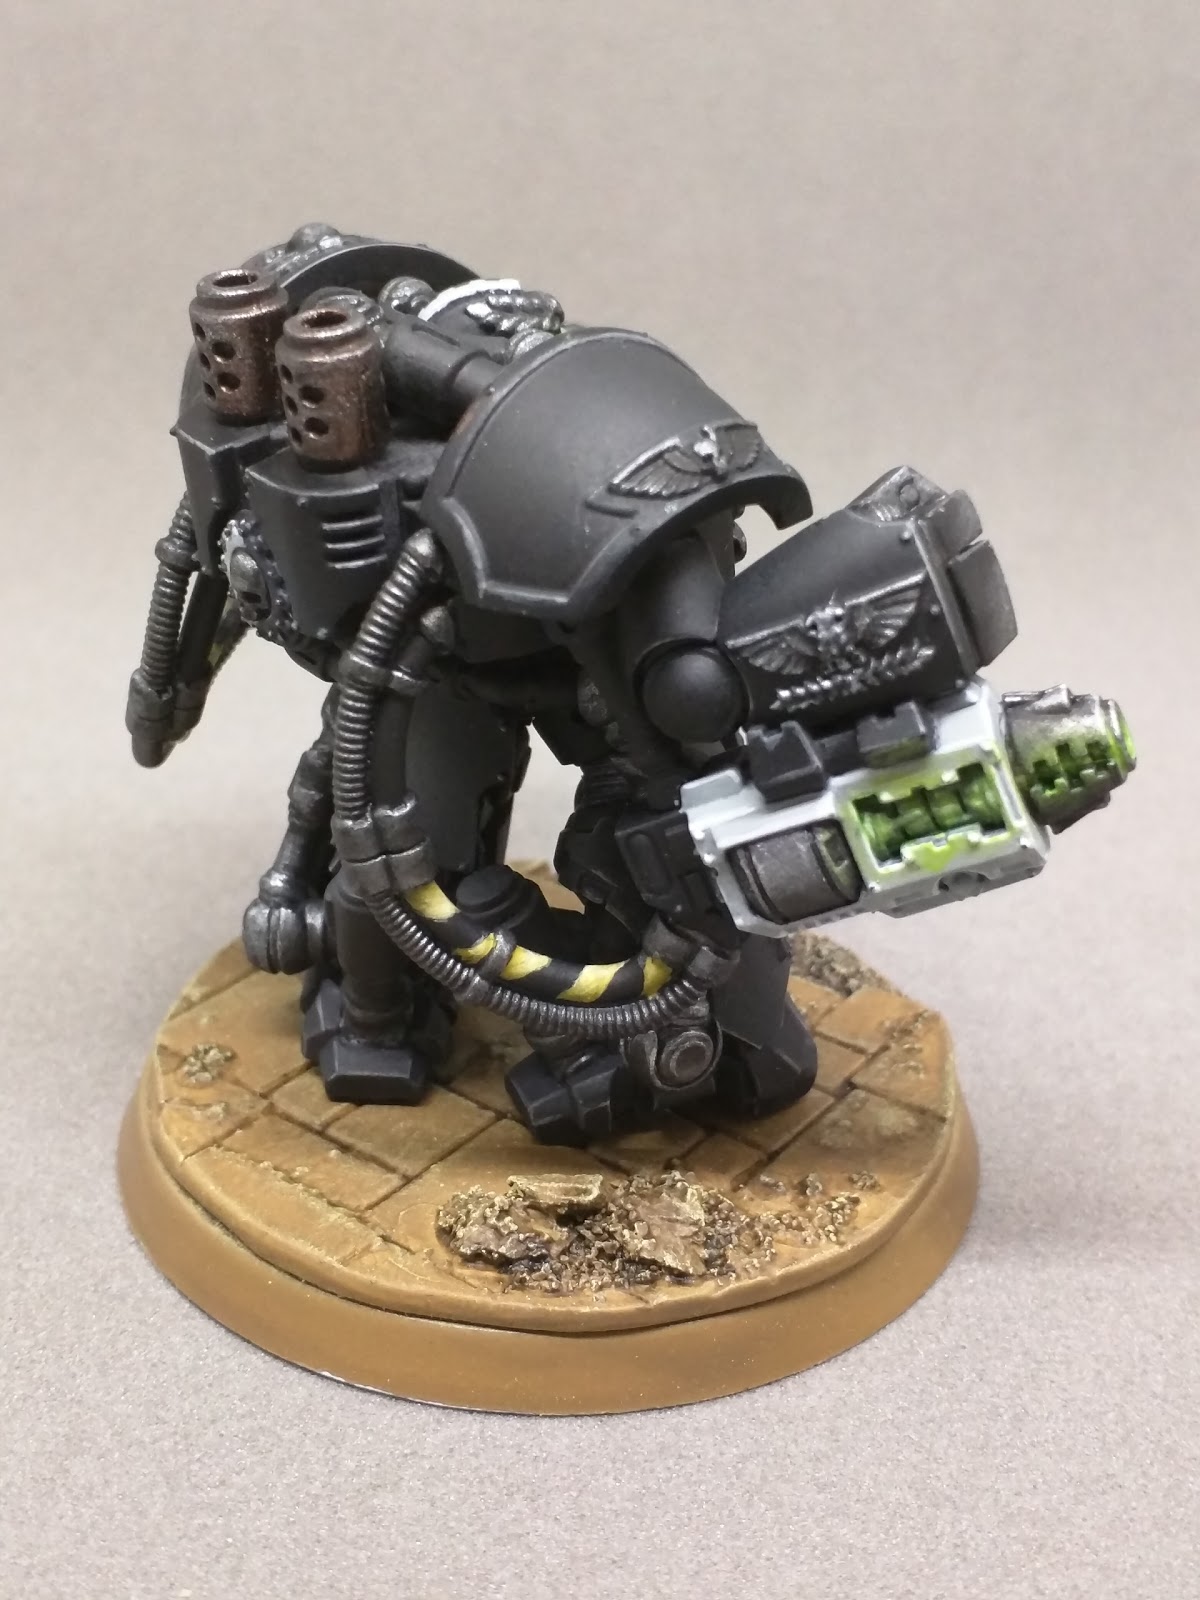
I had done the majority of the work on them a few months back but hobby painters bottleneck reared it's head, I stalled for weeks on the final small details. With the exception of some Forge World Clan Raukaan transfers (and maybe some small highlights I've missed) I'm happy to count this squad amongst those rare models in my 40k collection I call complete. I've only really attempted to achieve a tabletop or slightly higher level, so I acknowledge some shoddy edge-work on these guys but I'm happy to have a few more completed models. 

Just a side note, I opted to trim the side toes off the feet on these models. I appreciated the tiny dreadnought look the model designers were going for, but the inside toes seemed like they'd make walking difficult. I also think these models are bulky enough so the streamlined feet help make them look a little more nimble for my taste. I also added a spacer, roughly 2mm - 3mm, in between the torso and the legs to make them look just a little leaner.

The bases I made from the GW bases included with the kit and some flagstone plasticard and sand.

Not sure what I'll be working on next, but it really ought to be a few Capital Palette entries for the Nova Open since time is already running out for that event.

Enjoy.

First up the Squad Leader...


Followed Centurion 1... 


And Finally Centurion 2 (I know I should have 6 of them, what am I thinking)...